Playing Ag Bank Sim: Instructions & Helps for Instructors
These instructions complement and add to the information provided on the Get Started page of the
website.
Instructors should also read the “Game instructions for students (PDF)” before playing the game.
First of all, when students get the game code, the screen shot below shows how they “Join a new
game.” They simply key in the game code and click on “Find game.”

As your students join the game, their names appear in the “Unassigned Students” column. You simply drag and drop each name into the bank to which you are assigning them. Be sure to click the “Save Counties & Banks” Button before exiting the page.

At the beginning of the game, the instructor should provide the students with the timeframe for playing the game. In the example shown here, the game is introduced in a traditional class setting with follow-up discussion included in a portion of a lecture period some of the periods of play.

Next, move from the “Teams” tab to the “Simulation” tab. If your beginning year is 2010, the first column will show 2009.5. Click on “Generate Initial Financial Statements.” This generates the five tables of financial information for all banks within all counties. Initially, they are all identical.

Click on “Generate Initial Financial Statements” and you get the following screen.

Click on the hourglass to the right of any of the banks to get either a pdf or html version of the initial financial statements.
For example, Tables 1 and 2 for Bank 1 in County 1 for the initial period are shown here:

Click on “Begin Game” when you are ready for the students to see the game contents.
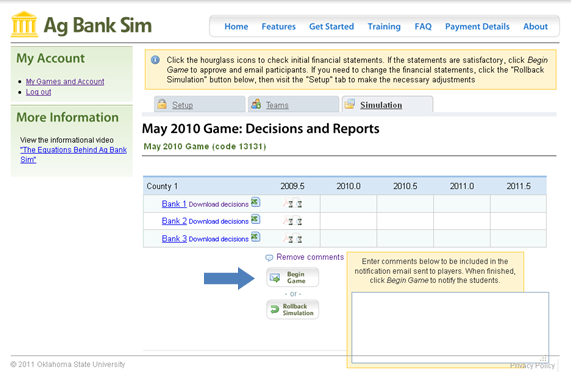
When you click on “Begin Game”, an email automatically notifies all students who have been assigned to teams. You can click on “Add comments” to include additional information in the email as shown above. If you decide to “Remove comments”, click on that link.
Here is the automatic email sent to students, specifically the student assigned as bank manager:

After clicking on “Begin Game” you get the following screen:
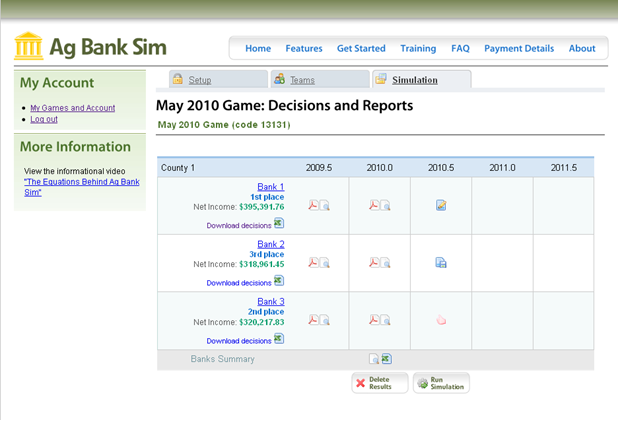
After the manager saves initial decisions, the icon will change. After all members of a bank approve the decisions, the icon will change once again. At each step, a pop-up message is available to explain the meaning of the particular icon. In the 2010.5 column, let your cursor/pointer hover over the icon for Bank 1 and you will get the pop-up message, “No decisions have been saved by the manager.” If you let your pointer hover over the icon for Bank 2, you will get the pop-up message, “Decisions have been saved by the manager, but not submitted for team approval.” If you let your pointer hover over the icon for Bank 3 (2010.5), you will bet the pop-up message, “Decisions approved by team, ready for next period.” In summary, the icons (and messages) inform the instructor about the steps being taken by each bank team.
The instructor has the ability to “Run Simulation” at any time. The instructor can also over-ride student manager decisions. Sometimes this is necessary, especially if the students do not review their decisions carefully. For example, a typo may result in loan officer salaries being $420,000 rather than the $42,000 amount that was intended. For this and other reasons, the instructor has the ability to “Run Simulation” then review the results before releasing the results to the students. After review, the instructor may “Rollback Simulation,” change errant input by a team or teams, then “Run Simulation” again. Each time the simulation is run, the instructor has the opportunity to review the results before releasing them.
Here is the student view when logging in to start making decisions and/or view outcomes of decisions.
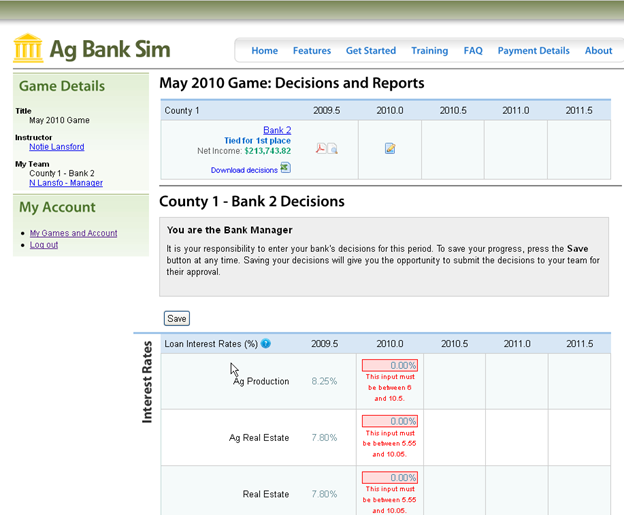
Bank managers click on the input boxes and begin entering decisions:
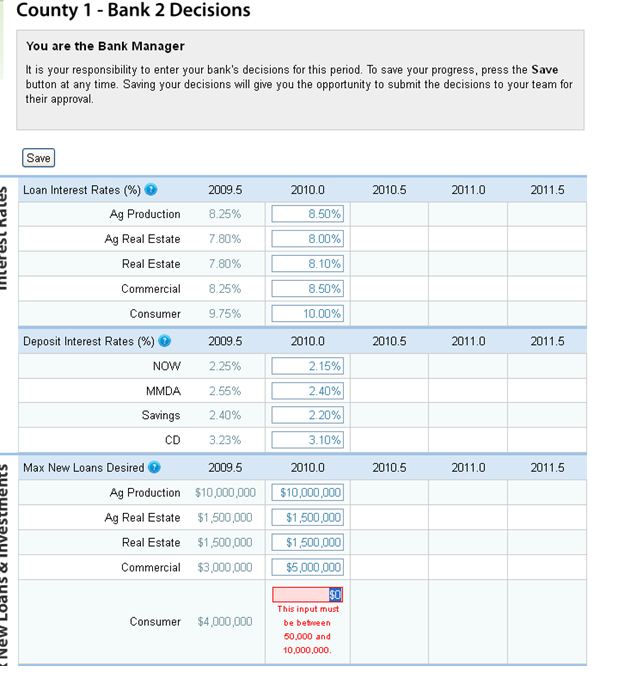
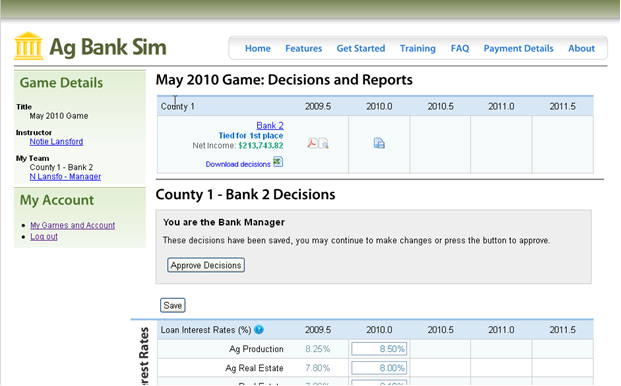
The student bank manager view after decisions are made and saved is:
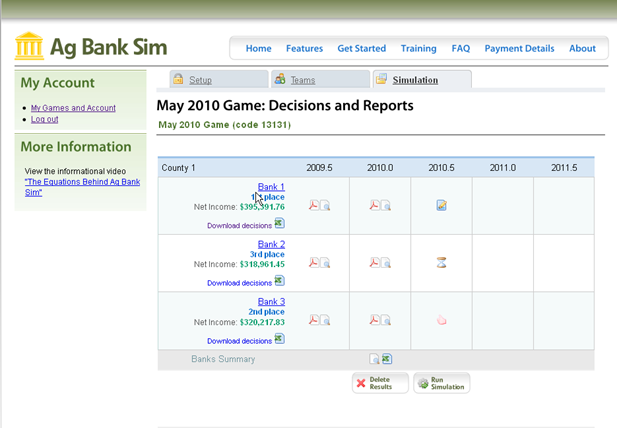
Now, here is the Instructor view when:
- Bank 1 has submitted no decisions
- Bank 2 manager has submitted decisions to team members for approval.
- Bank 3 manager has submitted decisions and decisions have been approved.
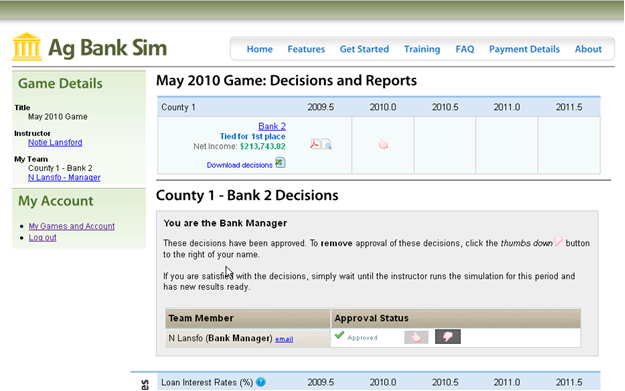
View of student bank manager page when decisions have been approved. Note that each member has the opportunity to approve or disapprove and may even change their mind up until the time that the instructor runs the simulation for that round.
What if a team doesn't make its decisions within the timeframe alloted?
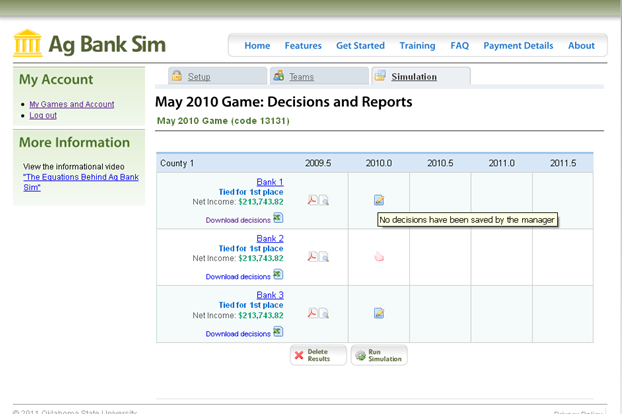
The instructor clicks on the icon and gets the following screen and options:
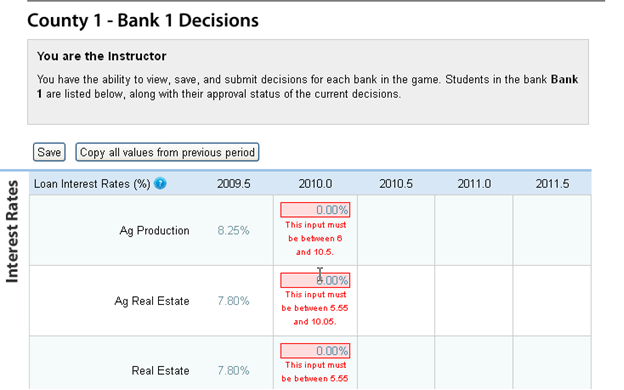
The manager can simply “copy all the decisions from the previous period” into the input cells by clicking that button. Doing so will present the following screen:
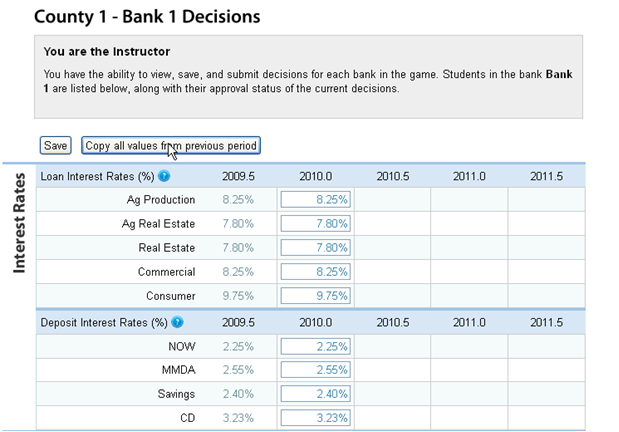
The instructor may simply accept and use the previous period’s values or may choose to change any and all items as the instructor sees fit. Here is an example:
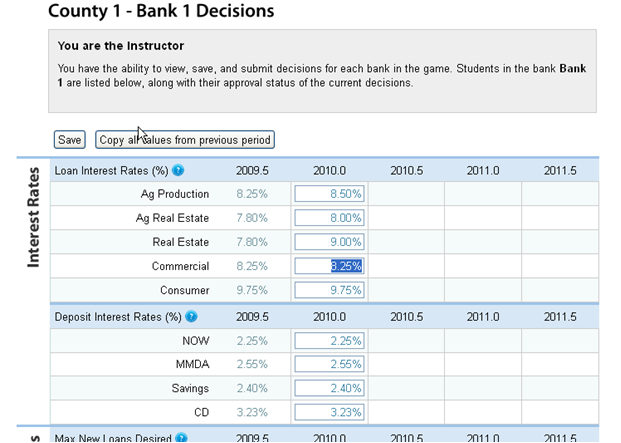
When finished, the instructor must save what has been done.
After the instructor approves his own decisions for a bank, the instructor screen shows an hour glass for that bank:
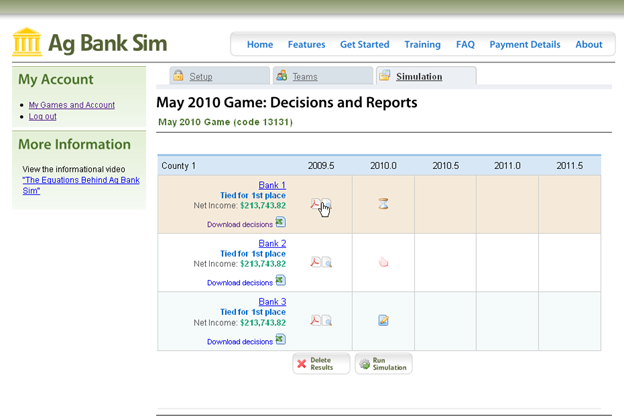
The message on the icon says that decisions have been submitted and need team approval but, in fact, the instructor does not need to wait for team approval.
For purposes of this example, the following scenario will be used:
- For bank 1, the instructor entered some decisions for the bank.
- For bank 2, the team completed the decision making as expected.
- For bank 3, in the absence of student input, the instructor opted to use the previous period’s decisions.
(Note: this is an atypical scenario, used simply for convenience to illustrate points.)
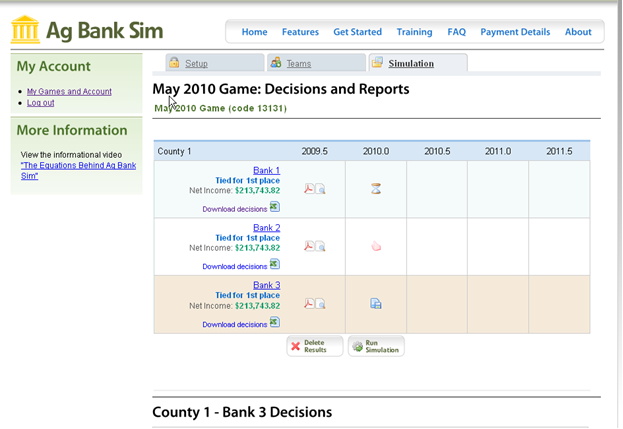
The instructor click’s on Run Simulation and gets the following:
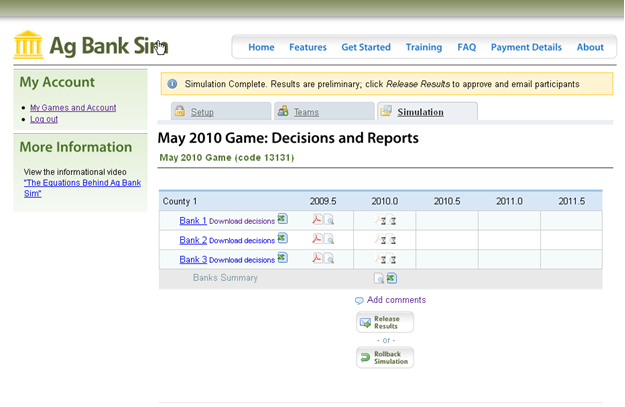
Now it is time for the instructor to look at the results of each team to make sure there are no anomalies or outliers or extremes. Any of these can ruin the game for the remainder of the periods. It is best to click on an “hour glass” for each team and perform a quick scan of each. Look for large changes in market share, large changes in net income, large changes in new investments, and such. Also note the excel file link at the bottom of the 2010.0 column. It shows a summary of key results for all three banks.
When the instructor is satisfied that the results are reasonable, the instructor clicks the “Release Results” button. (If the results are unsatisfactory, the instructor may “Rollback Simulation.”)
Upon release of results, an automated email is sent to every student announcing the ability to login and view the results.
Here is that email message:

Upon loggin in, this bank manager sees:
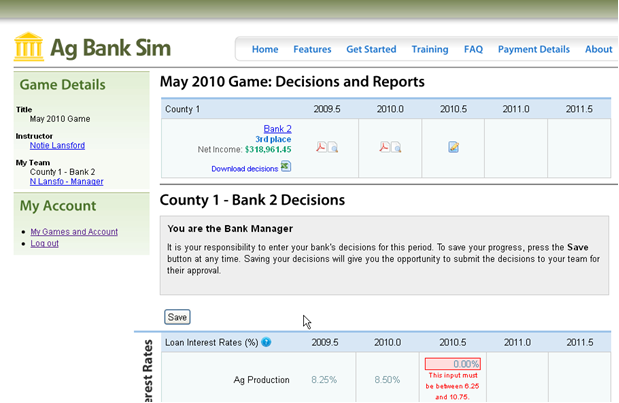
This bank manager and teammates may login and click on the pdf or html icons in the 2010.0 column and view Tables 1 – Table 5. Then they may go on to the next period (here, 2010.5) and make decisions for the next period of play.
Meanwhile, the instructor may interact via email, etc. with team members as needed.
After the final round of play, the instructor will have the usual option to release results but will also have the option to “Release Awards.” We have found it beneficial to hold an awards ceremony in the classroom. So, we do not release the awards until after that ceremony.
The instructor will also have the option to “Archive Game.”